Perfection Versus the Real World

April 17, 2011

While living on the Eastern Shore of Maryland I saw plenty of shiny new yachts. Most were kept in resort town marinas and saw, at best, occasional use by their absentee owners. They were pretty boats, to be sure: freshly varnished teak and pure white paint.
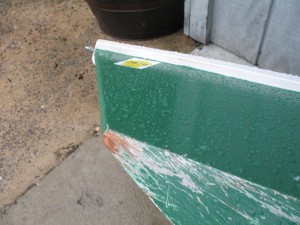
After a few arrivals and departures from a sandy beach, this is what my canoe looks like underneath.

But the boats that most captured my imagination were the old wooden workboats—the fishing and crabbing boats that were built from thick timbers by old-time craftsman who took their skills for granted. Most were scuffed, scraped, splintered, and hastily repaired. They exuded a strong odor of dead fish and dried mud on hot summer days.  But after decades of hard work, they exhibited a depth of character that no weekend yacht could emulate. Like a crumbling stone wall in an abandoned farm field, they became part of their environment. They blended harmoniously into the salt marsh landscape of the Bay precisely because they were rough hewn and hard used.

Maybe that’s why I never aspired to yacht-like perfection in my boats. I want people to know that my boat is homemade; I want it to look used. While I admire the stamina of builders who spend weeks and months faring their hulls and applying six, eight, ten coats of marine varnish (sanding between each), I was satisfied with grinding down the rough spots and slapping on a few coats of porch paint. Up close, the casual approach is obvious. There are bumps and drips just about everywhere. But I am perfectly content with the results. My boat feels “real.”

Every well used canoe needs some mud.

Still, part of me wondered if I would regret my hasty approach. Once I was on the water and my boat was exposed to the revealing glare of sunlight on water, would I wish for greater perfection? Maybe I would feel embarrassed by my humble work whenever a gleaming yacht slid passed.

But I recently had a revelation about this urge for workshop perfection. A few days ago I took my canoe—the “six hour” canoe I built last fall—to a local lake for its first outing of the season. This was only its second trip to the water and I doubt its total use by the family exceeded an hour or two hours of paddling. But by the end of the day, as I lifted it out of the water and hoisted it back onto the roof of my car, I immediately noticed that this new, barely used craft was coated in mud. Underneath, the paint had scraped off down to bare wood and fiberglass where the canoe dragged along the shoreline.

A quick once over with a hose and a touch up with a paint brush would make the canoe nearly good as new. But why fret about this “damage”? The canoe was just being used as a canoe should; the mud and scratches are badges of honor. And I’d rather enjoy my canoe than worry about every little ding. Instead, I found myself feeling smug that I didn’t waste my time sanding and painting. Why pursue a notion of perfection that cannot be sustained in the real world?

Back home, my Pocket Cruiser has yet to see the water; it has yet to see sunlight or rain. It has not yet hit a gravely beach, or hosted children with muddy feet who spill their drinks. It has not yet hit a dock—hard. But it will and, when it does, my brightwork won’t look so bright, the white paint will show dirt, the paint will scrape away and begin to bubble.

I can’t wait.

Epoxy Reconsidered

July 17, 2010

My last post was, I admit, a bit negative and, frankly, not really in character. Any essay titled “Why I Hate Boatbuilding” requires further explanation.

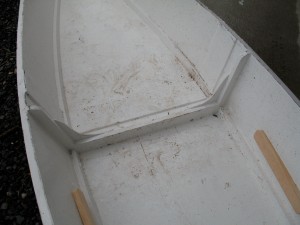
This is sawdust, not epoxy, but you get the idea. I'm smiling here, but I wasn't so happy after sanding the epoxy.

You may recall that I was reacting to a day spent sanding (or “fairing” to use the appropriate terminology) the epoxy-coated hull. Grinding away the uneven surface with a belt sander exposed me to a nasty cloud of epoxy dust, which is both unpleasant and unhealthy. I kept reassuring myself that I was taking extra precaution by using a respirator, but I still developed a persistent cough that lasted for several days.

I was ready to swear off epoxy and fiberglass forever and even now I am aggressively investigating building techniques that limit the use of epoxy. Who knows, my next boat might be a traditionally planked cruiser. More likely, it will simply be another plywood boat, but one that is held together with non-toxic glue, such as Titebond III, and no more fiberglass than necessary to cover the seams.

But I still need to finish this boat, which means that I need to make at least temporary peace with epoxy. Happily, I discovered several strategies that significantly lessen the amount of dust in the air.

First, and most obviously, I needed to get the dust out of the garage. I moved the boat closer to the double garage doors and positioned a fan behind the boat so that, in theory, dust would blow out and disappear. This helped, at least psychologically, as did my decision to keep the respirator on even after I finished sanding. I didn’t want to breathe in particles that lingered in the air.

But what most helped were changes in how I applied epoxy and how I sanded it down. New to the process of fiberglassing, I applied thick and uneven coats to the underside, which simply ended up as dust when I ground it down with the belt sander. But as my skills improved, I learned to apply thin, even coats that require less sanding. That was a major step forward.

Finally, and most recently, I discovered the advantages of wet sanding. This is not really part of my repertoire as a woodworker (you don’t wet sand a cherry table, for example), but a passing reference to this technique by an online correspondent made me curious and I immediately went to the garage, dipped some 80 grit sandpaper in water and discovered that it’s possible to fair the hull without making any dust at all. The disadvantage is that I need to sand by hand (for god’s sake, don’t dunk your belt sander in a bucket), but that’s small price to pay for peace of mind and, besides, I don’t like belt sanders anyway.

So the end of the story is that I no longer worry so much about epoxy and I think I can finish the project without having a visit by the EPA. But I still feel that epoxy and fiberglass—which are treated as necessary and magical ingredients in boat building—deserve to be treated with caution and used sparingly. Time and time again, I see builders deride old or nontoxic techniques for assembling and waterproofing boats. “Don’t use [fill in the blank]; epoxy is better!” is the common refrain. And in some ways, they are right. It’s the strongest, most waterproof adhesive available, as far as I know. But there are always other factors worth considering when choosing glues and coverings—ranging from cost (epoxy is more expensive than other kinds of glues) to environmental considerations (why do I recycle plastic bags in the house, but build a plastic-covered boat in the garage?) to justifiable worries about health (people can develop allergic reactions to uncured epoxy and dust is bad for the lungs).

And, finally, there are aesthetic considerations. At the very least, it’s an unpleasant substance to work with—a material to be tolerated more than enjoyed as it fills the air with acrid fumes and sticks to the skin with irritating tenacity. And anything that takes joy away from a hobby deserves scrutiny.


Why I Hate Boat Building

July 5, 2010

My mood turned sour this weekend as I discovered the most unpleasant task in boat building.

Buoyant from my success with fiberglassing, I returned to the garage ready to prepare the bottom and keel for painting. All I needed to do was make a quick trip around the boat with a sander—or so I thought. But I learned that it takes a great deal of time to get even a moderately smooth surface that is fully prepped for painting. Furthermore, I learned that there are few things more unappealing than spending a Saturday hunched over a whining belt sander while fine epoxy dust forms a thick and (surely) unhealthy cloud around my head. Yes, I was wearing a respirator, but the whole experience was antithetical to everything I associate with woodworking, sailing, and healthy living. Instead of aromatic wood shavings and fresh breezes, I left the garage coated in powder, my ears ringing, certain that I had turned my workspace into a future Superfund site.

I’m not a perfectionist; I don’t mind a somewhat uneven surface, especially on the boat’s bottom, which will remain hidden to all but the fishes. Given the option, I wouldn’t sand the bottom at all. But all boat building books in my possession agree that it is important to sand epoxied surfaces before applying primers and paints. Only by roughing the surface with aggressive application of 80 grit paper will the glossy epoxy have the necessary tooth to hold primer in place. On some forums, builders are told that a quick once over isn’t good enough; it’s important to remove all the gloss.

Of course, I can’t verify the truth of these statements. They make sense intuitively, but I don’t really know the difference between sufficient and inadequate sanding, so, like many novices, I felt compelled to take the safest route, which meant that I spent a full morning grinding away a startling amount of epoxy and creating an atmosphere filled with more dust than oxygen.

I came in for lunch so disgusted and dissatisfied that I actually declared to my wife that I would never—ever—build a fiberglassed boat again. Instead, I might build traditional boats—the kind that use oak timbers shaped by hand planes and sealed with pine tar and oakum (whatever that is). Alternately, I could take the opposite path and simply build my plywood boats without fiberglassing the hulls. Lots of people take this fast and cheap route (including Jim Michalak, one of my favorite designers). Sure, the cheaper plywoods will eventually check, but the boats will still float. I’d rather repaint every year than spend whole days sanding two hundred square feet of epoxy.

In the end, I don’t really hate boat building. But I am frustrated that that this one part of the process—so integral to the construction of modern plywood boats—is also so unnerving. I have lots of boats I want to build, but I need to find a way to build them in a healthy and satisfying way.


Finally Fiberglassing

July 4, 2010

The day I dreaded for more than a year arrived earlier this week. After two weeks of sanding, I was finally ready to fiberglass.

Six ounce cloth, pinned into place. The fabic has a nice drape and wrinkles are not a problem.

A close-up of the fabric showing how it meets the edge of the keel.

Applying the first coat.

Now you see it, now you don't. The fabric on the left side turned transparent after the first coat of epoxy.

You might recall that I began preparing for this day nearly six months ago when I practiced fiberglassing the hatch cover and rudder. I quickly learned that fiberglassing, despite its reputation as an alchemist’s art, is relatively straightforward. It is simply the process of adhering a white cloth-like material to plywood with several coats marine epoxy. I am told that this step protects wood with a waterproof membrane, adds some strength, and prevents unsightly checking of douglas fir plywood.

Before beginning work on the hull, I reviewed a wonderfully helpful two minute instructional video produced by West Systems, one of the major epoxy manufacturers. The online video reminded me to place the fiberglass cloth over the bare wood, pour some unthickened epoxy in the center, the gently spread the syrup-like substance over the surface with a rubber paddle, pushing the epoxy toward the edges. The cloth turns nearly transparent as epoxy fills the weave.

In nearly every case, additional coats are recommended to fully fill the weave and leave a smooth surface. It’s possible to wait for the first coat to harden, and then apply a second coat after sanding. That was my strategy with the hatch cover. But the video told me that I could apply the second and third coats after each preceding coat turned about as tacky as masking tape. This produces a stronger bond and eliminates the need for sanding—a real advantage, in my opinion. I hate sanding epoxy. So I set aside the entire day and decided that, come sundown, I would have a fully ‘glassed boat bottom.

Boat builders are an ornery bunch and they can argue over anything and there is an ongoing battle over best weight of fiberglass. It’s possible to buy cloth as thin as fine silk (two or three oz by weight) or as thick as canvas (eight or ten oz). The thinner cloth is lighter and needs less epoxy. However, the heavier fiberglass produces a stronger, more rugged hull. So priorities must be established. Some of us want to build butterflies—spare and elemental; others want tanks—impenetrable and protecting. I can’t help but believe that deeper values and worldviews are being expressed by our choice of cloth.

My choice? In keeping with my personality, I looked for the middle ground and followed the advice of people I know and trust. Chuck Leinweber, editor of Duckworks magazine and merchant of economical boat building supplies, advised me in a series of emails to go as light as possible but add some strength where it counts. His recommendation was six ounce cloth for the bottom, and four ounce cloth for the sides, deck and cockpit. I dutifully complied.
On the appointed day, I began by unrolling fourteen feet of the six ounce fiberglass, laying it along the port side of the boat’s bottom and holding it in place with pushpins spaced every two or three feet. I then trimmed the fabric along the outside edge of the boat, letting it drape over the sides by a couple of inches. I mixed a double batch of epoxy (four squirts of the epoxy, two squirts of hardener) and began the methodical process of adhering the fabric, taking long, firm sweeps across the fabric with my paddle. The goal is to saturate the cloth and avoid bubbles. It sounds tricky, but it’s actually easy work.

When the first coat is finished—five batches in all—I repeated the process on the starboard side. An hour later, I returned to the port side and applied the second coat. This took even less less time and used about half the amount of epoxy. Once again I walked around the boat and did the same thing to the starboard half. Back and forth I went until, by mid afternoon, I had three full coats on both sides.

One part that is not fiberglassed is the boat’s keel. If there is any consensus within the Stevenson boat building community, it is this: Don’t fiberglass the keel, no matter how much you may want to! New builders like the idea of encasing the softwood keel. It makes sense to protect a part of the boat that takes the most abrasion. But experienced builders insist that this actually promotes rot. Water will seep in eventually, get trapped by the fiberglass and do its dirty work. I did paint a thin coat of epoxy over the wood (I couldn’t help myself), but I forced myself to follow the advice of fellow builders and fiberglassed up to, but not over, the keel board.

The only challenge to fiberglassing, as far as I can tell, is learning to apply even coats and avoid drips. In this regard, my skills are poor but improving. The trick, I am learning, is to apply thin coasts. It’s temping to pour on the epoxy in order to get a quick buildup, but this approach almost guarantees a lumpy, uneven finish. The port side was the most uneven; the starboard side was a little better, reflecting the slow evolution of my skills.

I had better luck with the hull sides, which I glassed a couple of days later. For these vertical sides, I couldn’t pour the epoxy over the fabric, so I decided to use a small paint roller. I found that the foam roller easily saturated the cloth, but prevented unnecessary buildup. Each coat went on quickly and, by the end of the day, I felt like an old pro. I hung around for and extra half hour, smoothing out a few drips and sags, but the end result was a surprisingly even finish.

So the step I most feared turned out to be not so bad after all.


Easy Over

June 21, 2010

I’m ahead of schedule and feeling motivated. After spending several more hours filling and sanding the cockpit and decks, I was ready to turn the boat over by midweek. But how do you flip a 500 pound plywood box without damaging or (gulp) destroying fifteen months of work? I could easily imagine scenarios leading to crashes and disaster.

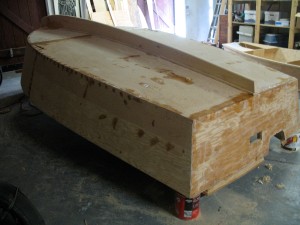
Frankly, the boat looks boring upside down.

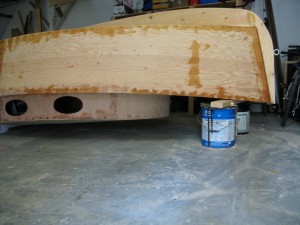
This is a little more interesting. Plus, you can see how the cabin is off the ground.

My plan was simple: lift the boat onto its side, then gently ease it over so that it was resting bottom up. But I didn’t want to lose control of the boat at a critical moment and I didn’t want the cabin roof and cockpit coaming to bear too much weight (and possibly crack) while being turned.

The key to maintaining control of the boat was to recruit as many willing volunteers as I could find, so I dragged my wife and three children to the garage promising that the work would “only take a minute” and that it would “even be fun.” Meanwhile, my insurance policy against cracking and breaking was to cover the garage floor with lots of padding. I had heard that some builders roll their boats onto tires, so I cut down an unused tire swing from our yard and rolled it into the garage. I also dragged over a bale of peat moss and about five rolled up sleeping bags.

Lifting was easy. The whole family pitched in, but it could have been accomplished by two people, or even one fit and determined builder. In a moment the boat was resting on its side—slightly tilted, of course, but in no immediate danger of falling. While my wife and the younger kids made sure it didn’t fall back down, my oldest son and I positioned ourselves on the opposite side of the boat and nudged it toward us. We had no difficulty controlling its decent and it gently rolled onto our carefully positioned cushions.

The job was accomplished and the boat was safe.

Our final step was to lift the boat off the ground so that it wouldn’t have to rest on the cabin roof. For this, I placed two paint cans at each corner of the transom and rested the bow on a short length of 2×4 set between two larger cans. Again, lifting the boat onto these supports was easily accomplished by the family. The boat now sits off the ground and neither the cabin nor coamings are pinched.

I am now looking at parts of the boat I haven’t seen for nearly a year. It brings back memories and emotions from the first days of building. Seeing the keel–the first thing I assembled–reminds me how anxious I was about the project during the first weeks of building and how determined I was to not make mistakes. I now see how meticulously I positioned each screw and how hard I worked to fit the laminated keel pieces together without any gaps. And I recall how stressed and frustrated I felt when I found small gaps in the lamination despite my best efforts. At the time, I had little understanding in my materials and no faith that my boat would float. Make one small mistake, I believed, and the whole thing would dissolve on contact with water.

Now, of course, I take a far more philosophical view of my work. I still don’t know how well my boat will sail or how well it will hold up after a season or two. But I’ve learned a great deal and overcome many barriers, so I no longer fret about small mistakes. That’s what epoxy’s for! I say.

I have already started filling and sanding the underside and, if I can open up a free day, I should be ready to begin fiberglassing within a week. More humbling lessons await as I tackle the next and—quite possible—final big hurdle.


Putting Away the Hammer; Picking Up the Sander

June 14, 2010

Suddenly—unexpectedly—I finished the construction phase of my boat. I keep flipping through the directions, assuming that there must be another board to cut and glue but, no, it’s all done. I can put away the drill and circular saw.

Portholes cut.

Sanding and filling the cockpit. It's not fun--but it's not hard.

The official last step was to cut out the oval portholes. I don’t need to install the windows at this point, but when that time comes I will fabricate my own from some leftover Plexiglas gathering dust in my woodshop, which saves some money and feels pleasantly frugal. Other builders, I notice, opt for more expensive ready-made portholes, but these can cost $100 or more–$400 in all for a set. There is also a growing trend to use inexpensive “inspection hatches,” which are more typically used to provide access to watertight hatches. But it’s possible to also use them for portholes, even if they don’t look quite as fancy. They also cost much less—about $10 to $15 per window.

There will be more cutting later. Aside from the portholes, I still need to assemble the mast and there are two or three small decorative details that will be added at the last minute. But I don’t need to worry about any of that right now. For the moment, I am fully occupied by the long-dreaded task of filling holes with epoxy and sanding everything smooth.

It’s time consuming and, frankly, unpleasant work. The weather turned hot and muggy last week and I feel like my whole body is covered in a fuzz of sawdust after even a few minutes with the belt sander. For health reasons, I wear a respirator when sanding the epoxied surface, which is awkward and uncomfortable. It really is not possible to wax poetic about the ancient art of boat building after a half hour of this sort of work.

On the other hand, it’s not hard work. I just have to mix up a batch of epoxy, thicken it with wood flour, dab a bit in each screw hole, and smear a bit more along the seams and joints. I then smooth it down with a rubber paddle; it’s just like spreading joint compound on drywall. For the inside seams, I smooth a bead of epoxy with a popsicle stick or, in a pinch, my gloved fingers.

As my knowledge of epoxy grows, the quality and speed of my work improves. One important discovery was that I should use “slow” hardener in warm weather. Two part epoxies can be mixed with “fast,” “medium” or “slow” hardeners, which (obviously enough) regulates the speed of the hardening process. When I bought my first gallon of epoxy last year, I followed the recommendation of an online correspondent who said that “medium” hardener was a good all round choice. Which it is—as long as the temperature stays below, oh, about 75 degrees. In warmer weather, it wants to “kick” (begin the hardening process) almost immediately, which meant that I had to work at full speed every time I mixed up a batch. If I waited too long, the epoxy would generate so much heat that it would melt the plastic cups I use to mix the adhesive and quickly turn into a rock-hard mass.

In contrast, “slow” hardener allows me to work at my leisure and I’m able to fill holes with more care and in a more thoughtful way. If you are building a boat in the summer, the right hardener makes all the difference.

Everyone hates sanding and there are many jokes about the drudgery of the work. I think one builder even named his craft “50 Grit,” reflecting his feeling that all he did was sand. But I find that the work goes quickly. Since the wood will be covered by fiberglass, I don’t need to sand the wood a mirror-smooth surface, which means that I only need to grind down the rough spots. While epoxy is hard, it quickly yields to a sander and I can cover a great deal of territory quickly. By the end of the weekend, I had filled and sanded the entire cockpit, which is probably the hardest part to finish. I was even able to move on to the cabin roof.

I learned not to make predictions, but at this rate, I should be ready to turn the boat over (which is another source of anxiety) within a week so that I can sand the underside and, from there, begin the fiberglassing process.